Know The Shadows
How To Draw Shadows Part 2 - Beginner/Intermediate
In the last post I mentioned how difficult it is to view shadows as objects, since our brains are wired not to. We have a hard time figuring out their shapes and edges. Today I want to give you some simple rules that shadows follow, that makes them easier to find. You can also use these rules to create shadows on stylized art and cartoons. It's not good to combine invented shadows with realism though! For realism, reference is essential.
Shadows look best and are the easiest to draw and paint, when coming from a single source. When setting up reference or looking for existing photos, try to find this kind of single source light. Other lighting can be there, but should be very subordinate to the main source so you don't see any double shadows.
Once there is a main source, you have a single direction that the light is coming from. Light can come from any direction; front, back, top, bottom, right, left, and all areas in between. There are, however, common lighting directions that make the subject look it's best, and makes things simpler.
Light is usually coming from one side, and most of the time, also coming from higher than the subject. This is an area ranging from the left side, and moving up and around the subject to the right side.
5 most common light directions:
1) Straight from the left
2) From upper left
3) From above
4) From upper right
5) Straight from the right
In addition to these basic directions, light can be coming from in front of the subject or from behind. As you might imagine, from the front makes the subject more clear and is far more common. So, almost all light in drawings and paintings will originate from the 5 directions above, but also from slightly in front of the subject too.
Many people prefer the upper right or upper left. This makes it easier to decide where to place light as you compose, and also to figure out where it might be coming from when using existing references. Start with upper left or right.
Shadows are always on the opposite sides of the light source, so they’ll be on the lower right or lower left.
Shadows are always half of any object.
Half of the moon is always in light, and half is always in shadow. It appears to change simply because where the light from the sun is coming from - from our point of view.
If the moon is mostly in light, then the sun is currently to our side and in front of the moon. That means that most of the half that is always in shadow is on the other side where we don't see it. What we do see, is a crescent of shadow, that touches exactly half of the moon’s edges.
Every object - or feature on an object - can be thought of as having a visual set of 4 basic edges.
Top edge
Bottom edge
Right edge
left edge
If half of the object is in light, and half in shadow, then two edges will have the light and the other two edges will have the shadows. This is true no matter what direction the light is coming from (except from directly in front and directly behind, neither of which is easy to accomplish and not very drawable).
Remember that the most common light source is from the upper sides. This means that you are likely to find that the top of all the objects you're looking at, as well as one side, are in light. The other side and all the bottom edges will be where the shadows are.
With light from the upper left, shining on a face, all of the top and left edges will be in light. All of the shadows will be on the right and bottom of each feature.
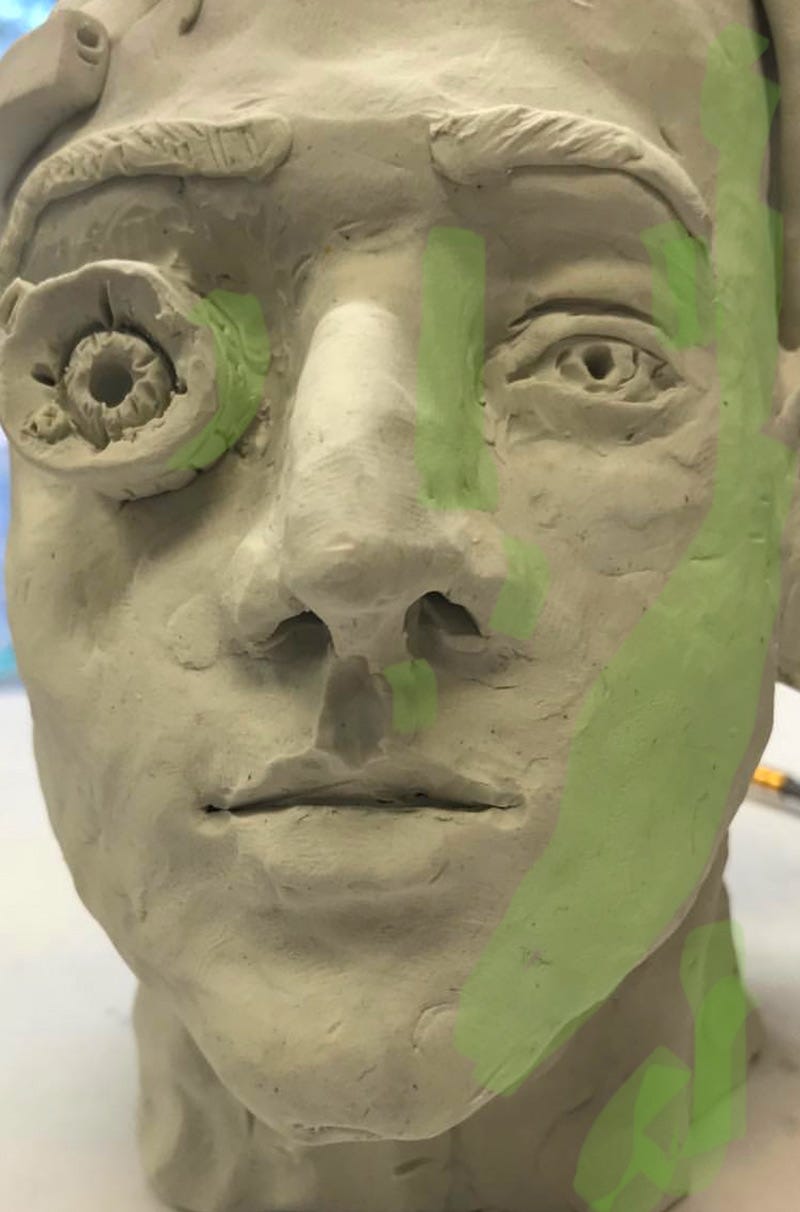
The right of the nose, cheek, eyelids, forehead, chin, jaw, neck, shoulder, hat, etc. will be shadowed.
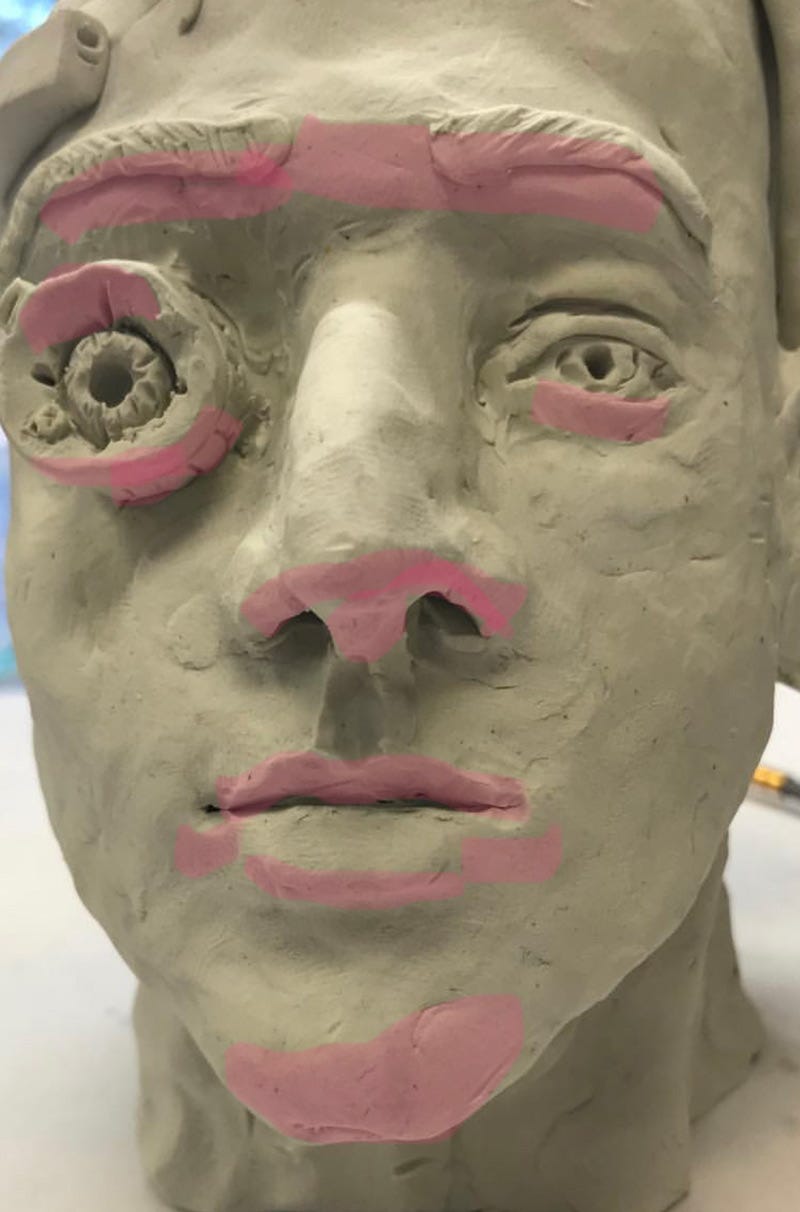
The bottom of the nose, chin, eyebrows, lips, etc. will be shadowed too.
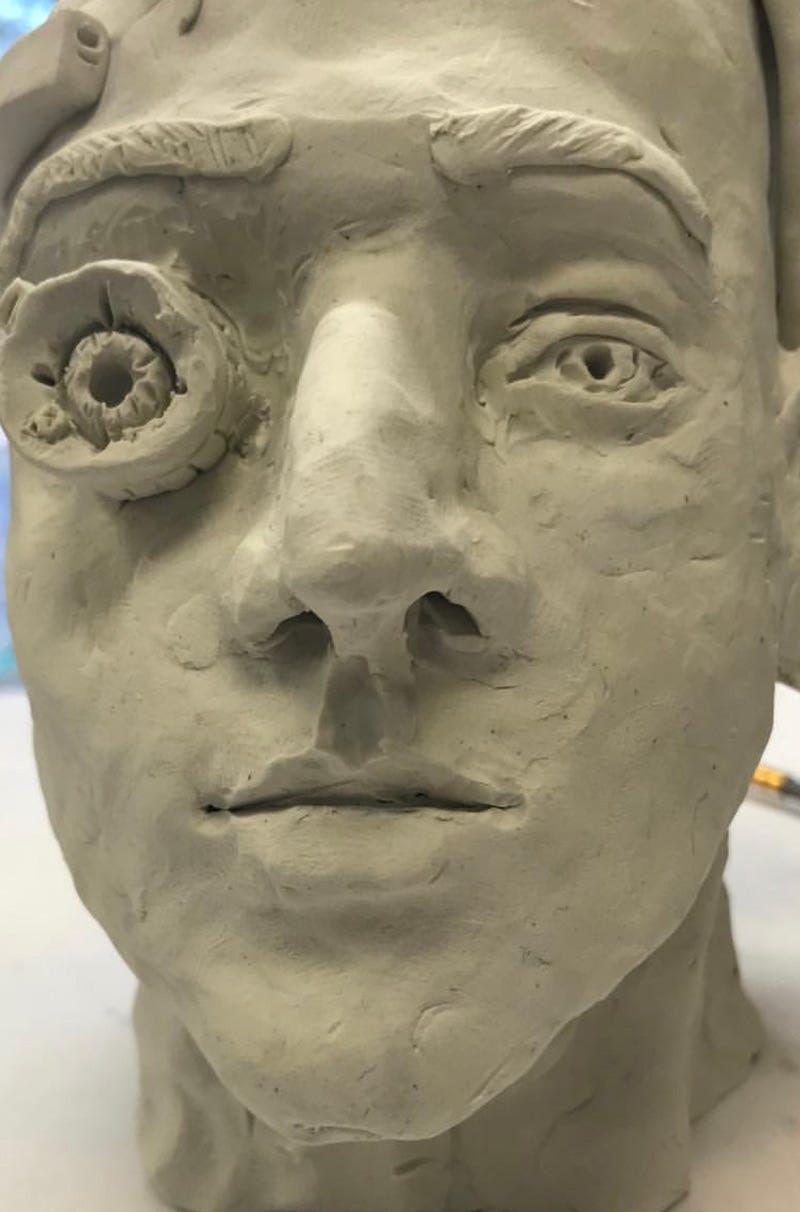
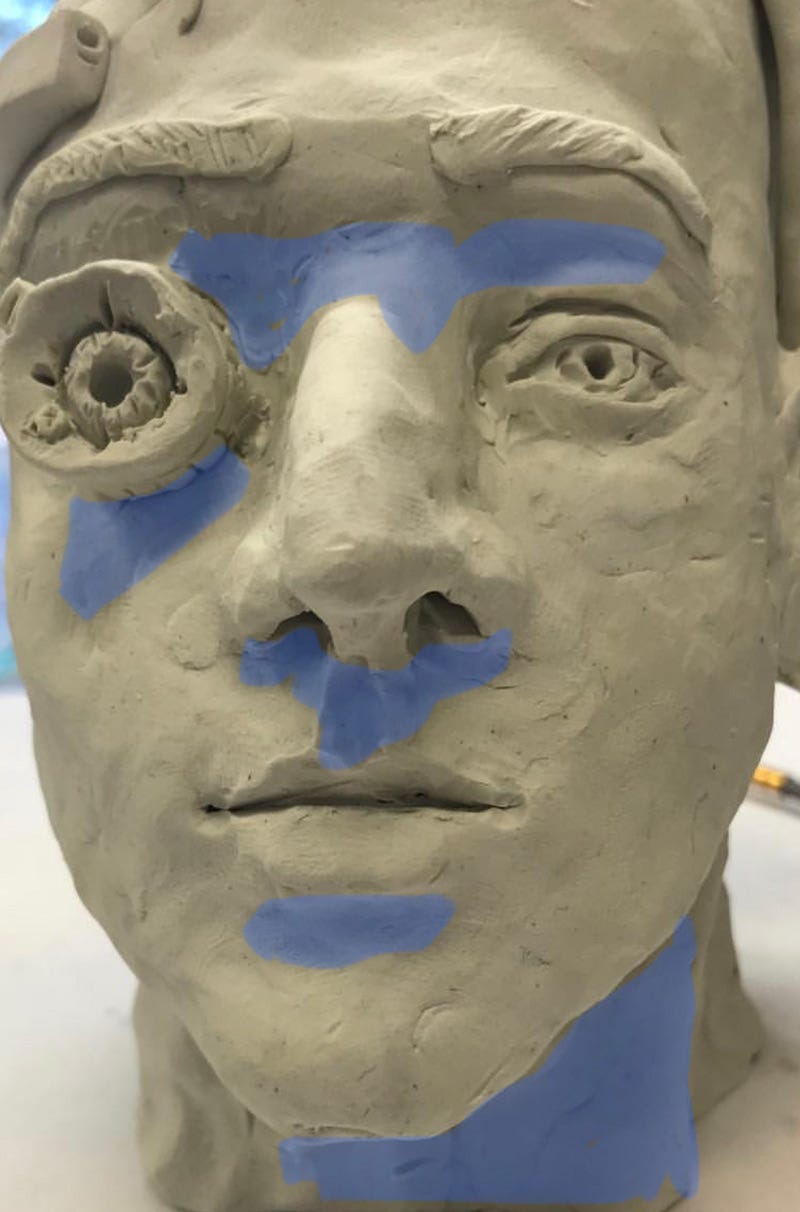
See the 4 images at the end of the post for examples on a clay model. (yes, I made a borg, I have to entertain myself somehow).
The PINK version shows the shadows in pink on the bottoms of each feature.
The GREEN version shows the right of each feature.
The BLUE version shows the shadows that are not actually on features, but underneath them. These are cast shadows, and they are different from the edge shadows we’re discussing today. The nose makes a shadow underneath it, and so does the brow, for instance. I included these because we see them, so it can add to the confusion if you don’t know why they’re there.
Thinking of shadows as being all on the two edges opposite the light source can simplify many things. Sometimes though, it is still confusing because of what we think of as the top. We don’t always identify the smaller features that are protruding from things, but you can think of them as bumps. A bump has it’s own shadows, but lets use a better sounding name of “local shape”. Anything that is on top of it's local shape - or feature - will be facing up, and things that are on the bottom of a local shape are facing down. The area between the nose and the opening of the mouth is all one rounded mass of muscles, or one local shape, with the reddish upper lip actually positioned on the bottom of the whole thing. Conversely, the lower lip is almost a sideways cylinder, and the reddish part is mostly on the top of it.
The upper lip is on the bottom of its shape, and the lower lip is on the top of its shape. How confusing is that? But it becomes easier when you know what to expect by thinking about what direction the part is facing.
Anything angled downwards will be in shadow, so the upper lip is darker. The lower lip is in light because it is facing mostly upwards, and is lighter.
Knowing what to look for always helps artists. Keep drawing every day if you can. The world needs happy artists.
Dennas


